文章出处:www.04007.cn
腾讯云docker安装的 emqx,以下命令查看EMQX安装位置
[root@VM-20-3-centos ~]# docker ps -a  //查看EMQX CONTAINER ID
CONTAINER ID   IMAGE              COMMAND                  CREATED          STAT    US                    PORTS                                                                                                                                                                                                                                                                                               NAMES
3b213f9ff6eb   nodered/node-red   "npm --no-update-not…"   23 minutes ago   Up 2    3 minutes (healthy)   0.0.0.0:1880->1880/tcp                                                                                                                                                                                                                                                                              mynodered
12a59bb97aed   emqx/emqx:4.3.11   "/usr/bin/docker-ent…"   2 weeks ago      Up 2    weeks                4369-4370/tcp, 5369/tcp, 0.0.0.0:1883->1883/tcp, 0.0.0.0:8                                                      081->8081/tcp, 0.0.0.0:8083-8084->8083-8084/tcp, 6369-6370/tcp, 0.0.0.0:8883->88                                                      83/tcp, 0.0.0.0:18083->18083/tcp, 11883/tcp   emqx
[root@VM-20-3-centos ~]# docker exec -it 12a59bb97aed /bin/sh //使用ID访问EMQX文件夹
/opt/emqx $ cd ./etc
/opt/emqx/etc $ vi emqx.conf  //打开配置文件,关闭匿名登陆
打开的文件后,按ESC,左下角显示 - ,再按 / ,在命令行中输入以下allow_anonymous查找到该位置,按 I 把allow_anonymous = true修改为false,关闭匿名,修改完成后,按ESC,再按 :wq 保存退出
#禁止匿名登录,allow_anonymous默认是true
vim /etc/emqx/emqx.conf
## Value: true | false
allow_anonymous = false //关闭匿名
acl_nomatch = deny      //ACL规则设置
,首先就是防匿名用户登录操作。关于这项是否成功可以在管理后台的websocket中直接点击connet判断是否禁止匿名用户登录,如果正常开启则必须输入username和password才能连接。
旧版本添加用户名密码:
在Emqx4.3版本之前存在一个emqx_auth_username扩展,可以通过启动emqx_auth_username插件模块修改其配置实现账号密码验证。进行如下操作即可使用。
#导入插件模块
cd /usr/lib/emqx/bin
sh emqx_ctl plugins load emqx_auth_username

#方法一:命令添加账号密码或者编辑配置文件
emqx_ctl users add admin public //用户名:admin  密码:public
#方法二:编辑用户名密码配置文件
vim /etc/emqx/plugins/emqx_auth_username.conf
## username 认证数据
auth.user.2.username = admin  // 用户名
auth.user.2.password = public // 密码
## Password hash
auth.user.password_hash = sha256但在Emqx4.3版本之后不一样了,官方文档:https://docs.emqx.cn/broker/v4.3/changes/changes-4.3.html#_4-3-0-%E7%89%88%E6%9C%AC 里有注明4.3版本中emqx_auth_clientid 与 emqx_auth_usernmae 合并为 emqx_auth_mnesia。emqx_auth_username模块从此废弃。在Emqx4.3版中加载emq_auth_username插件会报不存在的错误,所以不要再去寻找安装emqx_auth_username模块了。
新版本添加连接用户名密码:
直接修改emqx_auth_mnesia.conf模块配置文件,添加账号密码。
在Emqx4.3版中加载插件会报不存在
# ./emqx_ctl plugins load emq_auth_username

Load plugin emq_auth_username error: not_found.
[root@VM-20-3-centos ~]# docker exec -it 12a59bb97aed /bin/sh
/opt/emqx $ cd etc
/opt/emqx/etc $ cd plugins
/opt/emqx/etc/plugins $ ls
acl.conf.paho emqx_bridge_mqtt.conf emqx_psk_file.conf
emqx_auth_http.conf emqx_coap.conf emqx_recon.conf
emqx_auth_jwt.conf emqx_dashboard.conf emqx_retainer.conf
emqx_auth_ldap.conf emqx_exhook.conf emqx_rule_engine.conf
emqx_auth_mnesia.conf emqx_exproto.conf emqx_sasl.conf
emqx_auth_mongo.conf emqx_lua_hook.conf emqx_sn.conf
emqx_auth_mysql.conf emqx_lwm2m.conf emqx_stomp.conf
emqx_auth_pgsql.conf emqx_management.conf emqx_telemetry.conf
emqx_auth_redis.conf emqx_prometheus.conf emqx_web_hook.conf
/opt/emqx/etc/plugins $ vi emqx_auth_mnesia.conf
## Password hash.
##
## Value: plain | md5 | sha | sha256 | sha512
auth.mnesia.password_hash = sha256
##--------------------------------------------------------------------
## ClientId Authentication 客户身份验证
##--------------------------------------------------------------------
## Examples(例子)
auth.client.1.clientid = admin //第一个用户名
auth.client.1.password = 123456 //第一个密码
//依次类推,
##auth.client.2.clientid = dev:devid
##auth.client.2.password = passwd2
##auth.client.3.clientid = app:appid
##auth.client.3.password = passwd3
##auth.client.4.clientid = client~!@#$%^&*()_+
##auth.client.4.password = passwd~!@#$%^&*()_+
##--------------------------------------------------------------------
## Username Authentication
##--------------------------------------------------------------------
## Examples:
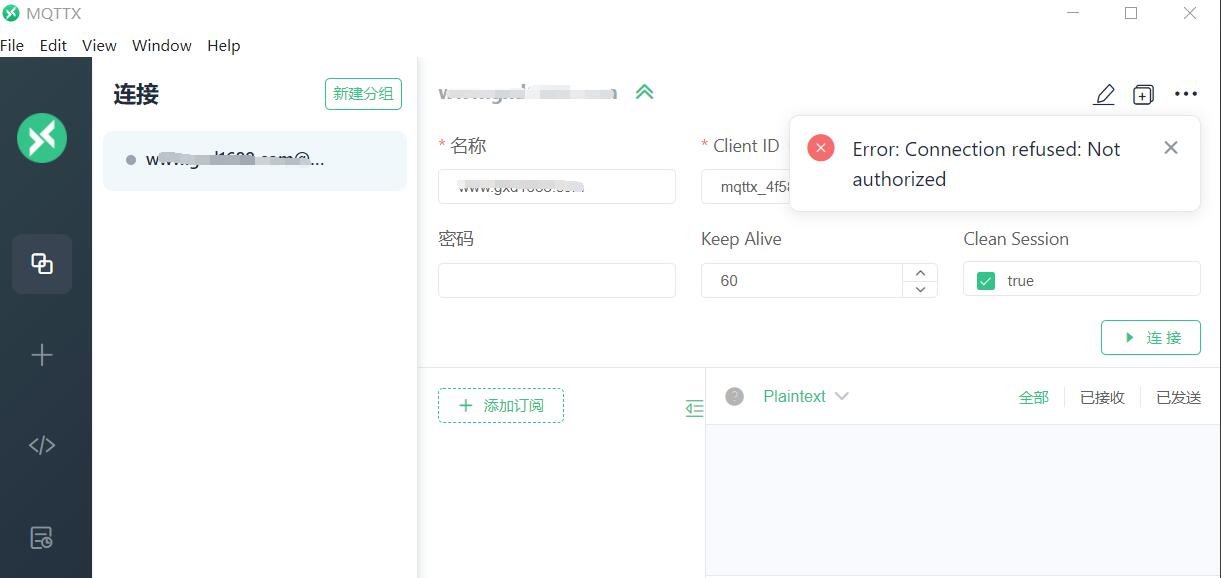
//这两个也要修改,第一次没改,官方的连接软件提示未授权
auth.user.1.username = admin //这里也要修改
auth.user.1.password = 123456 //这里也要修改
##auth.user.2.username = feng@emqtt.io
##auth.user.2.password = public
##auth.user.3.username = name~!@#$%^&*()_+
##auth.user.3.password = pwsswd~!@#$%^&*()_+
- emqx_auth_mnesia.conf 30/30 100%
//保存文件后退出
/opt/emqx/etc/plugins $ cd ../
/opt/emqx/etc $ ls
acl.conf emqx.conf plugins ssl_dist.conf
certs lwm2m_xml psk.txt vm.args
//修改访问控制配置文件,打开acl.conf,添加一行用户访问配置:
//打开配置文件
//{allow, {user, "admin"}, subscribe, ["$SYS/#"]}.
//允许admin用户订阅系统级消息。保存后退出,重启emqx服务即可
/opt/emqx/etc $ vi acl.conf
%%--------------------------------------------------------------------
%% [ACL](https://docs.emqx.io/broker/v3/en/config.html)
%%
%% -type(who() :: all | binary() |
%% {ipaddr, esockd_access:cidr()} |
%% {ipaddrs, [esockd_access:cidr()]} |
%% {client, binary()} |
%% {user, binary()}).
%%
%% -type(access() :: subscribe | publish | pubsub).
%%
%% -type(topic() :: binary()).
%%
%% -type(rule() :: {allow, all} |
%% {allow, who(), access(), list(topic())} |
%% {deny, all} |
%% {deny, who(), access(), list(topic())}).
%%--------------------------------------------------------------------
{allow, {user, "dashboard"}, subscribe, ["$SYS/#"]}.
{allow, {user, "adminn"}, subscribe, ["$SYS/#"]}. //添加这一行,允许admin用户订阅系统级消息
{allow, {ipaddr, "127.0.0.1"}, pubsub, ["$SYS/#", "#"]}.
{deny, all, subscribe, ["$SYS/#", {eq, "#"}]}.
{allow, all}.
/opt/emqx/etc/plugins $ emqx restart
[root@VM-20-3-centos ~]#
另外Mnesia认证默认即是使用 sha256 进行密码哈希加密,可在 etc/plugins/emqx_auth_mnesia.conf 中更改,其方式也和原来的emqx_auth_username模块不一样。而是使用auth.mnesia.password_hash配置项来设置。最后重启emqx restart并在管理后台启动emqx_auth_mnesia插件即可。
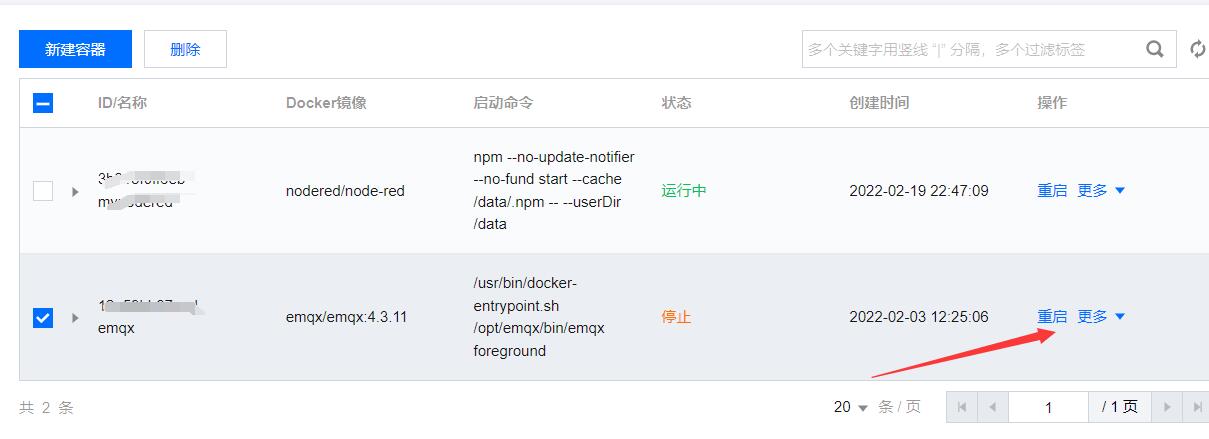
不知道为什么,命令行 emqx restart运行后,IP:18083,登陆不了,提示网络错误,进到腾讯云的 docker容器下看了一下,emqx没有运行,重启了一下,正常了

使用emqx的软件,没有输入用户名跟密码测试了一下,

<h1>客户端上线下线的系统消息订阅</h1>
<p>客户端离线与在线消息属于系统级通知,需要客户端订阅系统预定义的topic:</p> - <p>离线topic
$SYS/brokers/+/clients/+/disconnected</code></p></li><li><p>上线topic <code>$SYS/brokers/+/clients/+/connected</p> - <p>上下线topic
$SYS/brokers/+/clients/#</p>
def on_connect(client, userdata, flags, rc):
    # this method will be called when client connected to server successfully
    # TODO do something when this client been notified about successfully connected to server
    pass


def on_message(client, userdata, msg: mqtt.MQTTMessage):
    # this method will be called when this client get a message under the topic(s) it subscribed, encluding the system message (I assuming you've already configure it properly)
    # TODO do something when this client get a message
    pass


mqtt_server = "127.0.0.1"
client = mqtt.Client("surveillance_client")
client.username_pw_set("admin", "aoto@123")
# 定义回调方法
client.on_connect = on_connect
client.on_message = on_message
# 600为keepalive的时间间隔
client.connect(mqtt_server, 1883, 600)
client.subscribe('surveillance', qos=0)
client.subscribe(r"$SYS/brokers/+/clients/#", qos=0)
# 启动mqtt消息订阅(非阻塞式)
client.loop_start()
<p>以上代码运行后,若有其他客户端上线或下线,此处on_message()回调方法,回收到系统上下线消息,如下所示:</p>
客户端上线 topic:  $SYS/brokers/emqx@127.0.0.1/clients/654321/connected
客户端上线消息报文 :
{
  "username": "admin",
  "ts": 1627476021893,
  "sockport": 1883,
  "proto_ver": 4,
  "proto_name": "MQTT",
  "keepalive": 600,
  "ipaddress": "127.0.0.1",
  "expiry_interval": 0,
  "connected_at": 1627476021893,
  "connack": 0,
  "clientid": "654321",
  "clean_start": true
}
客户端下线 topic:  $SYS/brokers/emqx@127.0.0.1/clients/654321/disconnected
客户端下线消息报文 :
{
  "username": "admin",
  "ts": 1627476028659,
  "reason": "tcp_closed",
  "disconnected_at": 1627476028659,
  "clientid": "654321"
}

可使用正则表达式r"^\$SYS\/brokers\/.*\/clients\/.*\/(dis)?connected"匹配与过滤上下线消息以进行业务逻辑处理。
1 条评论
新盘新盘 这个月刚上新盘 新车第一个吃螃蟹!coinsrore.com